Showing posts with label DIY. Show all posts

Saturday, January 16, 2016

Rustic School Bus Conversion


Hi! I'm Chelle and this is the 97' International 7.3 school bus I spent a year converting and getting to the point I could re-register it as a motorhome in Texas. When possible I reused what I already had or could find on craigslist. I salvaged wood and other materials myself when I came across them and purchased everything else a little at a time as I needed and/or could afford.  


The bus is wired to run off either campground hook-ups or gas generator. It's set-up for boondocking without a generator as well. For camping off-grid I have solar lights, solar hot water, a propane cook burner, propane Mr Buddy heater, woodstove, Coleman outdoor oven and a BBQ grill. At campgrounds I plug into shore power, and only need 30 amps to run the large roof mounted a/c unit. I use my dorm refrigerator, crock pot, toaster oven, electric hot plate, coffee maker, lamps, fans, heated blanket, electric heater, and Coleman roof top air conditioner. 


The peace sign I painted on the storage box is symbolic of how long I've wanted to do this. I've been dreaming about traveling the country in a converted school bus since I was a kid and a magnificent smoke belching, monstrosity of crazy colors and peace signs pulled into the gas station next to us. I was fascinated both by the bus and the young people inside. A girl with flowers in her hair saw me gawking at her. She hopped out smiling and handed me me the biggest most perfect peach I had ever seen. I questioned Dad for the next few miles as I ate my peach. He said they were "hippies". From what I gathered 'hippies' didn't have real jobs or houses, preferring instead to live in a bus, like they were camping all the time, just going wherever they want. I doubt it was his intention but the whole lifestyle sounded 'right on' to me! I decided I wanted to be a hippie and live in a school bus! 


I wanted my bus to feel like a tiny home. I kept all the windows. The cuttains hang on cables the length of the bus, and I've sewn magnets into the sheers to easily toss them up and move around. I use a vintage potty I picked up at an antique fair, for midnight 'emergencies'. 


I picked up a used cabinet, replaced the damaged top with plywood, and covered the stains on the doors with color, then covered the whole thing a dark walnut to get a look liked. 


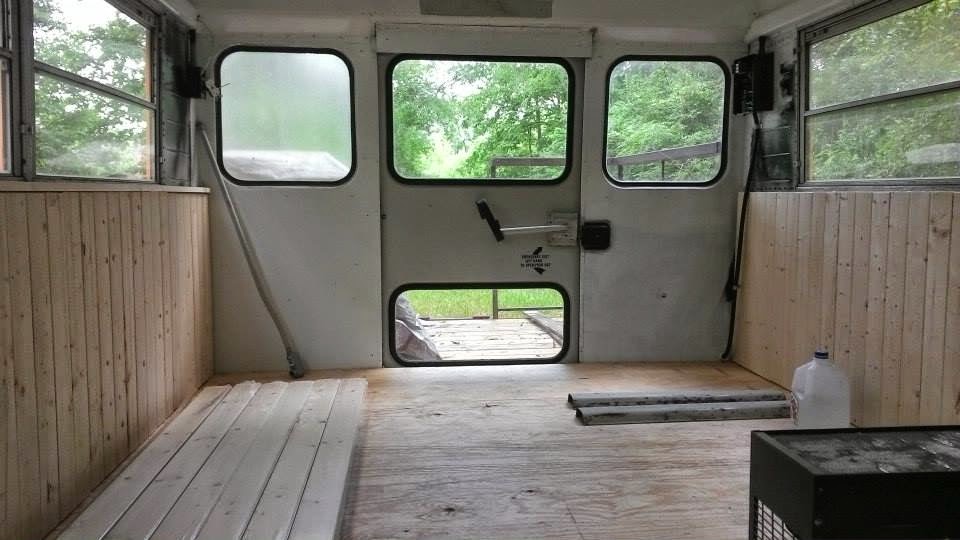
My carpentry skills matched my budget - both 'light', so I was mindful to keep my design simple, and serious carpentry work minimal. I used 3/4 insulation board and 1/2" construction grade plywood for the floors. The walls were insulated and finished with pine plank wainscoting. 


Awesome deck right? Well it was illegal. With some help I cut it down. It's safe, legal, and there is still enough room to swing the back door open all the way, store a generator, etc. The rails can be removed for loading, and gate drops down to use as steps.
  

The electrical was already done, which was the part of the conversion I had the most concern about. It had low miles, a new Coleman rv air conditioner insalled, all but 4 seats had been removed, it had a large rear deck, new tires, and string lights. The ceiling was spray painted black and a brand new refrigerator which reeked of cinnamon schnapps! I'm sure she was destined to be a party bus before I got her.  

Wednesday, January 22, 2014

Deluxe Lofted Barn Cabin

There's a little place that sells Derksen portable buildings in Dayton and I always have a hard time passing it by, without stopping to roam thru the cabins and sheds, whenever I venture to town. Last week we stopped by again and got more information about the options and pricing of these little darlings.

This is a Derksen Deluxe Lofted Barn Cabin. This one is 12'x30', the smallest of their 'Deluxe Lofted Barn Cabin' style which come as large as 16'x32'. It's the most expensive style with the unique corner porch and bumped out windows, but also eats up more interior square footage than the others.


The price is $7,925 before tax, free delivery within 50 miles. It comes standard with 2 lofts, but the lofts are high and have little headroom above them. Optional extras to make the lofts more usable would cost extra. 8' walls are $500, lower loft (which come standard at wall height) $100 each. You can add more windows, 2x3's are $75 and 3x3' windows $100, a 2nd door is $200. So there's lots of options.
I was asked to check the 'rent-to-own' deal, so here's how it works. Monthly payments would be apx $360 for 36 months. Each month $260 of the payment goes to pay down the principle and $100 goes to 'rent'. I believe the down payment was one month's rent, and there is no penalty for early pay-off.


I found it difficult to arrange an interior lay-out that functioned well for us. It's hard to use that bumped out space. Possibly a kitchen/eating area, maybe a large built in window seat and extra bed. You'll notice I don't have ladders or stairs figured out. The door being so far into the cabin is awkward as well, in my opinion at least. 

 These are photos of the same style cabin only 4 feet longer at 12x34. They can be finished out really nice. The bathroom is behind the kitchen, and bedroom beyond at the end of the back of the cabin.

Nook in the front of cabin

Saturday, January 4, 2014

The Kidd - A Teeny Tiny Texas House

Just when you thought Tiny Texas Houses couldn't get any smaller, meet 'The Kidd' - Brad Kittel's smallest house to date. 'The Kidd' has a footprint of only 65 sq. ft.

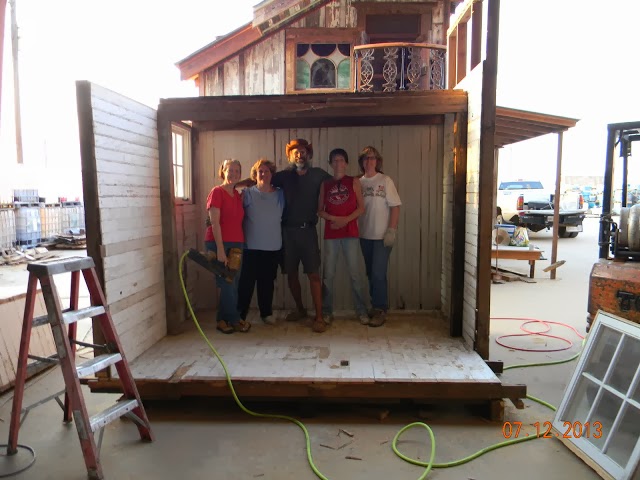
It was the focus of a TTH workshop I attended last summer, and I'm really proud I got to work on it. 


Sweet slim profile on this teeny tiny house will remain at Tiny Texas Territories as guest accommodations.

His next prototype will be slightly slimmer and built to lay flat and slide into a cargo container for ease of shipping.

Large windows, antique door, and a covered deck on two sides. 

 
A cozy place to spend a weekend.

It's got a really large sleeping loft.

Great windows for light and breezes.

Awesome porches add to the available living area.


Sunday, July 28, 2013

My Ice-Chest A/C For Tent Camping

It's easy to make a cheap air-conditioner for your camping tent. Cut one hole in the top of the cooler to match the size of the small fan you plan to use. Expecting electricity on my trip to Tiny Texas Houses in Luling, I chose this small fan which lay face-down on top of the hole. The air is pushed down, past frozen water bottles or frozen ice packs placed inside, cooling and condensing it as it circulates before being pushed out the 2nd hole you need. Mark carefully around the 'vent' you choose. I used a PVC elbow joint, cut my 2nd hole and pushed the elbow in place, now I can direct the flow of cold air coming out onto me instead of straight up.

Plan A - The Idea
I was anxious to put it together to prove to my skeptical family it would work. They just smiled politely as I explained to them how it would work but said very little. I plan to cut 2 holes in the top of the cooler, one to snugly fit the 4" pvc elbow, and another just a bit smaller to fit this little $8 fan placed face-down over it. The fan will push the air into the ice chest past the frozen water bottles and out the pvc elbow. Only because I knew it was going to be flimsy to transport did I decide to wait till I actually got to my destination to cut the holes and put it all together and I'm glad I did. 

Plan B - The Reality
When I arrived with my tent, I couldn't resist the generous offer to spend my week there in a tiny house, even if it meant having no electricity to run my fan. Luckily I had decided to wait until I got there to actually make the thing because I simply cut a much smaller hole to fit the little battery powered personal fan I had brought with me as well. It worked like a charm! I saved the piece I cut out for the elbow, and kept it to plug the pipe and saving my ice when I wasn't running it.
When I got home and used my electric fan it worked even better.

Plan C
I'm planning to build another one using this old ice chest. I'll add some baffles to ensure the coldest air gets circulated well before exiting the vent. At first I planned to place 2 of these 4" elbow vents on this one, but having had a discussion at TTH I now realize I need more air to come in than can come out to further condense and cool the air. I may place two much smaller elbow vents on this one. Thank's guy's! So that's the plan... I'll update with the reality soon....


Thursday, June 27, 2013

'Little Red' - 8'x16' Cabin

Here's s another version of  an 8'x10' cabin that fit's Tiny Texas House' newest "Loopholer" design. I finally figured out how to get the arched roof on this one, not exactly right yet but close. The total height from floor to roof peak is 12' 4". I understand a cabin of this size can be loaded onto a 16' trailer (or even built on it) and transported yourself, without permits. This is only the first phase of a house to be constructed in three phases.
The second phase of construction will be adding a downstairs bedroom wing off one side, and the third phase a larger living area off the other side. What will at first be used as living area in this cabin now, will become a large kitchen and dining area after the next two phases are complete. I need to work on it more, and don't have the actual framing in this model, but I imagine it should be designed and framed up in such way that the windows will become interior doorways to the other sections when complete.

SketchUp Link:

I tried to stay as close as possible to Brad Kittlel's floor plan of his latest 'Loophooler' design.
Just enough room for a small kitchen, full bath, and 10'x8' living area.
The sleeping loft is apx. 8'x8'.
I made a 'Gypsy Wagon' type roof for the cabin, it gives lots of space in the loft above.
A tiny old fashioned kitchen fits well, but I think I'll forgo the stove, and use a crock-pot, induction plate, and toaster oven in my cabin.
A three piece bathroom fits in the corner. 
The arched roof gives the loft a height of just over 5 feet.
Cute platform for a bed, made with wood pallets.